Okay, so here is part 4 on your journey to having a great pantry for emergency reserves! So far you've (hopefully) assessed why you want to have one, what meals you want to prepare, what kind of ingredients you are going to buy, and where you are going to put it all. So, the last step in this equation is "How much?" How do you know how much to buy? All you math-resistant homesteaders, do not fear! It's really quite simple, and as you'll see, it's a very logical conclusion to this whole process.
Back in Part 2, you made a list of 14 meals you are going to serve in a rotation over a specified period of time. (I chose 6 months for mine, so all of my samples are based on me serving each meal 13 times.) Now for the next part, you'll either need a paper and pencil (and maybe a calculator), or a spreadsheet program like Open Office or Excel. My choice is Open Office, and the default setting when you open up your sheet is 3 separate pages per sheet (bottom tabs to toggle between). What you'll see here are the different pages I have to keep my 3 steps separated.
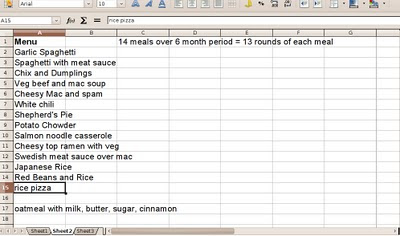
First off, I entered in my list of dishes.
Now on another tabbed page within that same worksheet, I made a list of all the ingredients I was going to need for these meals.
In column C, I wrote how much of the ingredient is going to used for each meal. In column E, I simply took the amount in column C and multiplied it by 13 so I knew how much I would need to make the meals 13 times. Now, on another sheet within this spreadsheet, I had taken an inventory of what I already had on hand. (See below for sample.) So, in Column H of this page, I took the difference between the two numbers. For the items I was lacking, I put the number in bold font so it would really stand out. Then, off to the right side I started a list of all those items so I could start dividing out when I was going to buy them.
As I had mentioned in Part 3, I had figured out that I could spend $100 every two weeks toward food storage and emergency supplies. I took my shopping list and knowing the approximate prices of the items on it, divided it up into two sub-lists that I would alternate shopping from. I also added in some toiletries and paper products as well as the food items. Also, if you are planning to can some goods to use in your pantry, do not forget about jars, lids, pectin, sugar, and special salts!
Then comes the exciting part of shopping and/or gardening and harvesting for your pantry. As I write this on my laptop, I have the pressure canner going with batches of potatoes. Over the past 24 hours I've canned 12 jars of cheese sauce, butter, and spiced pears. Maybe I'm weird, or maybe it's the inner-farm girl in me, but I get a "thrill" (to quote Anne Shirley) when I see my shelves lined with mason jars filled with yummy food. That feeling is a strange mix of contentedness, job satisfaction, and thankfulness to the Lord God above; the Giver of all good things.
I hope this 4 part series has been helpful to you in establishing your own pantry of stores. I pray you never have to use it, but if we should, I pray it will be more than sufficient for your family.
Blessings to you and your homestead,
Hillary At Home


No comments:
Post a Comment